Showing posts with label mdf. Show all posts

Thursday, 30 September 2021

September Sun

September is a tricky month. The kids go back to school (or if you are reading this in the future and are currently enjoying Covid-22, maybe they don't) but you can't appreciate it because you are still paying for that time off work you had over the summer.

The days are cold in the morning but still bright and warm in the afternoon, and for about half the month you still have some daylight in the evenings to get things done. And then autumn sneaks in, the rain comes back and you are soon huddled around a fire by 6pm, waiting for the wolves to come and eat you.

When it comes to tackling projects in my hobby closest, I normally need to wait for the perfect storm of need, desire, enthusiasm, time, materials and space in order for that project to miraculously transition from "Something I will do one day" to "Holy cow it is done!". But in September, all of those things can be substituted for desperation.

And so here are some trees, designed to match the mat I will use for Fallout and Gamma Wolves. And some billboards, also for Fallout, though now that I have painted them I've decided I will put them on bases so they aren't really complete. Now that It Is Dark Again, they may not be completed until 2022!

The trees are Woodland Scenic armatures stuck to MDF bases covered in sanded polystyrene and Sculptamold. I messed that up by making too much, so while two of the tree bases are relatively smooth, the other two ended up being clumpy and difficult to work with because it was drying by the time I applied it. I will make it in smaller batches next time so hopefully I will avoid the same mistake.

Also shown is the base for one of my Gamma Wolves frames because I wanted to make sure the colours and style of the tree bases matched. The images I used on the billboards are by Charlie Wilcher and I found them at his ArtStation page here

Wednesday, 28 July 2021

Horses! and.. more terrain.

On the back of painting five (!!) whole miniatures last month, I managed to finish two more that have been sitting on my painting desk since January.. two horses for use in Frostgrave. Can I use two at once? Nope. But you can upgrade your horse and I wanted a model for the basic horse, as well as a model to represent the horse after a few upgrades.

And of course, who will ride this horse but a captain. Might as well put all my gold coins in one basket..

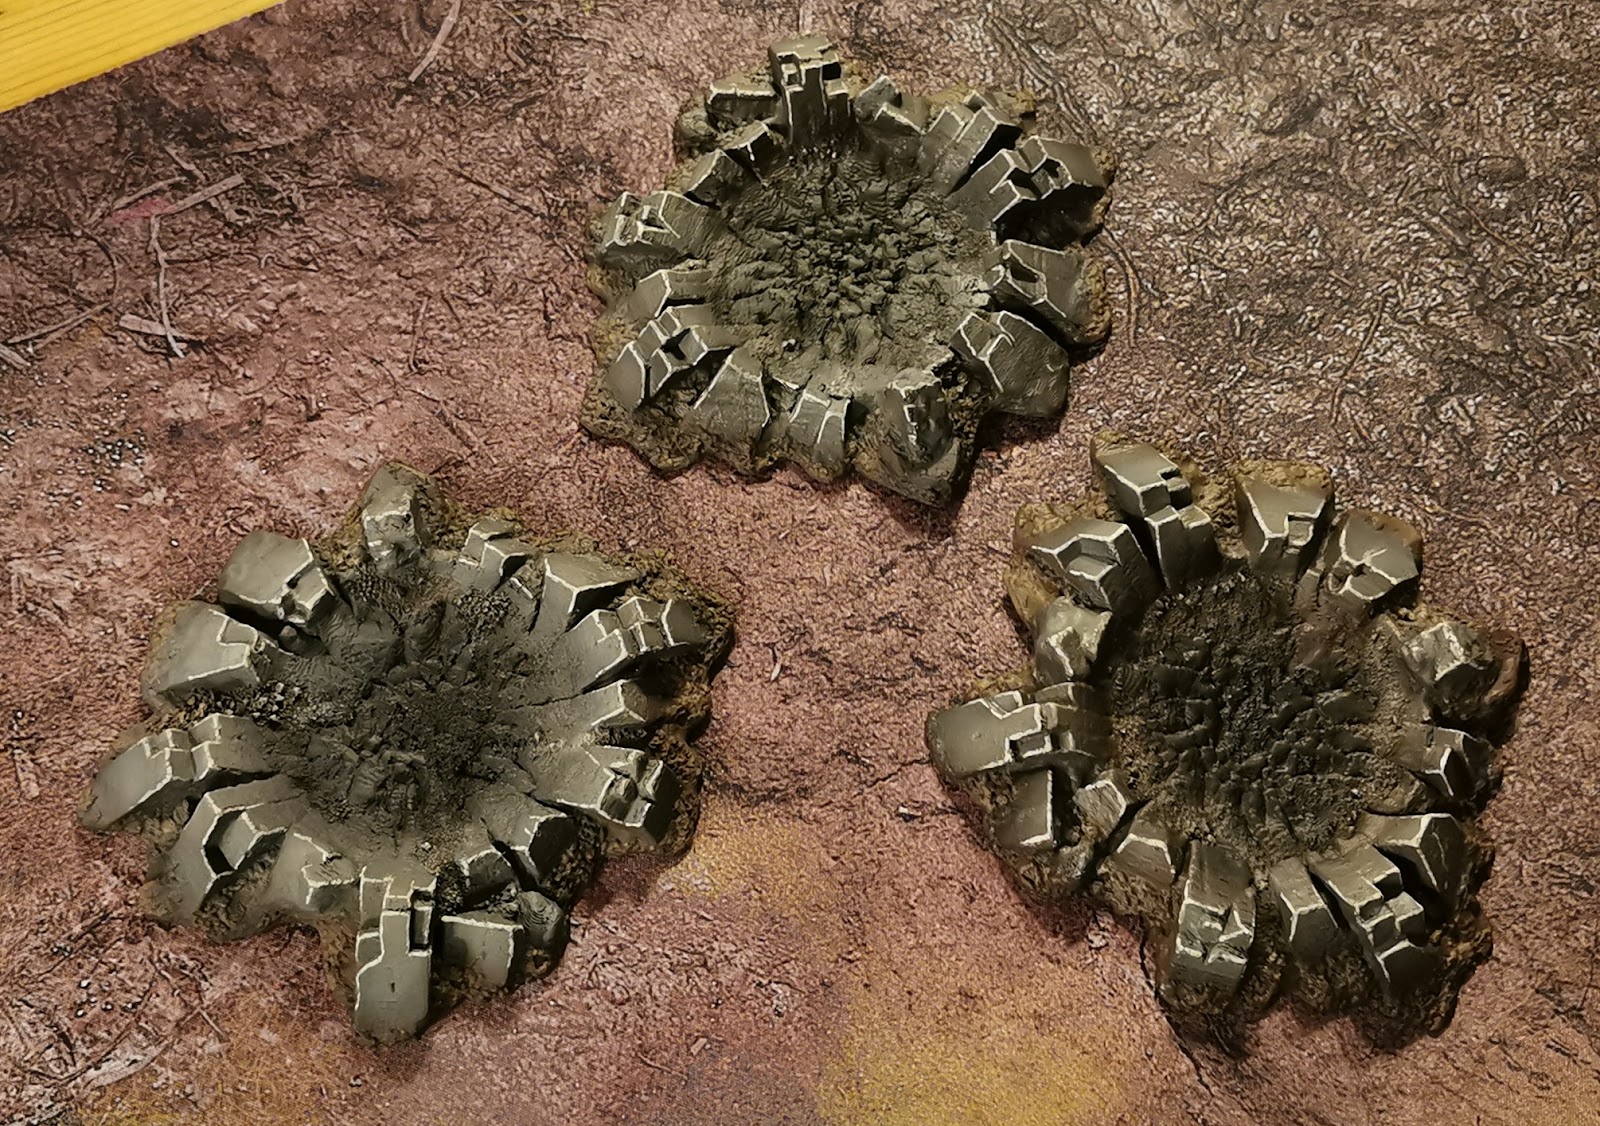
..and then since 7 models is more than I painted in the last two years, I figured it was time to get back to more terrain. First up, some 3D printed craters off ebay (because those GW moonscape craters still go for more money than I'm prepared to pay..)


They will be for one of my many planned Warzone tables, but also here is a clearer picture of them. In.. the sky? 


..and finally, my TTCombat Iron Labyrinth Ultima set. I love making MDF terrain but oh boy was this a chore to get through! Half of the set has been primed brown (and then I ran out of brown spray paint) and then sprayed green from above and I'm testing out weathering techniques on a few of the pieces to see what looks the best for the least amount of effort. 


Thank goodness for paint pens! 

Sunday, 13 June 2021

.. and speaking of terrain

Another project finished. Some tiles for Walking Dead, Zona Alfa and Fallout. These TTCombat harbour tiles are 1x1 so six will be enough to create a harbour section on a 3x3 water mat. But in most cases I will probably only use two or three of these on an asphalt / rubble mat. The smaller, angled sections and the stairs are from TTComat's Carnevale line. There is a piece of 0.5mm plasticard on top of each tile section to hide the original texture that was there.

Mind you, you can make a good 'base' for a 2x2 table with these. This is slightly too big for Walking Dead but eh, bigger deployment zones. 

.. and a fountain. Sadly I only had Vallejo water effects on hand, so I expect to be disappointed by the water results in 2 to 3 days..

Monday, 24 May 2021

Terrain Snob

I've had some Infinity card buildings sitting in my office cupboard for the longest time. Since.. the USAriadna pack came out, which was in the heady pre-pandemic days that seem like a distant memory. I got a second set with the Ariadna vs Aleph box, though it languished alongside the first.

It's not that I hate pre-coloured scenery in general or cardboard terrain in particular (I have plenty of Battlesystems stuff and what you get in those Infinity boxes is an excellent way of getting started) but.. the lack of geometric detail, the concerns about stability, the concerns about durability.. not to mention the fact that I have dozens of 'normal' MDF and hard plastic terrain kits (some even painted) meant that I always had a "better" option. I was a terrain snob!

Until tonight.

I've been meaning to have a go at the Dead or Alive supplement for Stargrave since it came out; I have more than enough minis assembled and this evening I had the opportunity to play it.. but ferrying boxes of fragile terrain to and from storage just to try it out seemed like a chore. Besides, I didn't have enough pieces finished in a consistent style to fill a 3x3 board and I knew it would bug me if I mixed and matched the styles (plus that would mean even more boxes).

(A store photo for one of the Precinct Sigma kits from MAS. Looks perfect for Judge Dredd, Realities Edge / Hardwired.. or Infinity, of course) 

Even so, I might not have considered the cardboard Infinity stuff if it hadn't been for the recent videos I watched showing off pre-coloured MDF terrain from Micro Art Studios (I particularly like the graffiti-strewn Precinct Sigma stuff) as well as the previews from Multiverse with their upcoming pre-coloured MDF products. It had warmed up to the idea of simpler, more robust buildings and there was no denying that the finish was far more detailed that I would ever achieve in paint.

(Preview from the Multiverse FB page. I'm getting a Fallout vibe from this!) 

So I opened up both packs, filled a 3x3 with rectangular buildings and shipping containers.. and since the art style fitted the mat, it all looked really good and played well enough. I'm certainly considering the hard card terrain sets from CB now and I might even pick up a few of the pre-printed MDF kits to see how I feel about phasing out my TTCombat sci-fi terrain..

(A humble card building from the Aplekton scenery pack. Humble, but useful. And 100% more painted than the robot)

Sunday, 5 April 2020

Even I finish things. Sometimes..

Hobby butterfly that I am, it is inevitable that I will occasionally - and often by accident - finish a project that I started. That has been the case in Feburary and March of this year where I finished off some terrain pieces primarily for Rangers of Shadowdeep. The excellent Gloomburg Tower from Warcradle and a bridge and walls from Warlord..

Thursday, 30 May 2019

Hobby Butterfly


So.. things have been busy these last two months and I have completed two new projects that were not even on my list two months ago (naturally).

I have a draft of a new Rangers of Shadowdeep mission, At Any Price, which is complete and uploaded, but needs more testing before I post it to the Facebook group, and a new Warzone mission, Storm Warning, which I already posted to the Warzone forum.

Now I am taking a break from the writing to do proper hobby stuff; namely I am painting up my TTCombat Sector 3 stuff which I need for my "Mars" Warzone table. A few panels still need masking and spraying white and I haven't decided if I will paint the hand rails orange or yellow yet, but the sponge chipping and washes that follow shouldn't take too long and then it will be complete.


I also ordered some more Forward Base buildings from Antenocitis. My original layout called for only two, plus the garage and two connecting corridors. However I picked up the hub at some point and now I have another three on the way. With 7 buildings I will at least have the option of filling a table with them, or splitting them between two 4x4 tables along with my GF9 and Sector 3 pieces.

As an added bonus, I should be able to use some of this terrain for Gamma Wolves. Having been inspired by the many great mecha models in the Facebook group I have dug out an old AT-43 Red Blok walker for a heavy frame and have purchased a few 1/144 Gundam kits that will be kitbashed into medium frames. They won't get painted any time soon, but I look forward to completing the models so that I can try the crew out.

Sunday, 1 October 2017

Another little project off the check list

I finally got around to sending off my vehicle wound tracker designs to Troll Trader a few weeks ago and I received the templates today. A few things seem to have gone awry with the cutting process but I can still totally make something usable out of these..


Somehow the hole didn't get cut, so I drilled it out. Note to self, drill it out before you glue the two halves together so that you can sand it down properly afterwards..


The long rectangular nameplate was supposed to be kept, but it seems like they threw it away with the rest of the cut outs! Doh! I made one up from a few layers of plasticard.


This had the added advantage that I could 'test' the idea of the wound tracker being made from acrylic as well, with the idea being that whatever colour the rest of the tracker was, the nameplate would be in opaque white acrylic so the player could write on it.


Wednesday, 30 August 2017

How many panels is enough? Always one more than you have!

Progress! I burned through another sheet of plasticard (okay, two) but made some exterior panels, as well as some small vertical panels for the ends of the corridors..


This gave me the level of interior detail I was hoping for, without protruding too much from the walls to make model movement difficult (of course, the actual rooms themselves is another story). I painted them up and fitted them in place, then followed Tom Schadle's colour scheme for the Warsenal Cosmica terrain - more or less - since the base colour of orange and white is what Antenocitis use on their own pre-coloured Forward Base set.


..and here it is, finally finished!


Monday, 21 August 2017

The horse lives!

With a new pressure switch fitted, my compressor is up and running again so this weekend was spent catching up on those Antenocitis Workshop corridor detail pieces. I havent glued the parts together yet as I will do another weathering pass.. and maybe add some more white, since these panels were supposed to BE white, but ended up a light grey.


But all things considered I am pretty happy with it so far, and will create similar panels for the front and back walls of the habitat.

Thursday, 10 August 2017

Back on the horse.. and then it died

So after a long time of ruefully eyeing up my Silhouette Portrait (which has been buried under a pile of hobby clutter for the last six months) I was finally motivated to break it out by the release of the Antenocitis Workshop "Forward Base" terrain, which I wanted to use on my Mars table for Warzone.

It arrived and was moderately fancy (not as shiny as the Cosmica stuff from Warsenal, but not as expensive, either.. so it just comes out ahead!) but the large flat colours give the terrain an overly simple look that doesn't suit Warzone. So with the Portrait literally dusted off, I got to work on some interior and exterior panel designs. Three sheets of 10 thou plasticard later, and I have these (left side is before punching out the cut away parts)


..which combine to make one of these!


..which goes here!


I was all set to prime and paint these interior panels and then when I started up my airbrush, the compressor died. I'm not confident I can get the desired level of smoothness if I paint these by hand, so for now I will have to continue making panels while I wait for the replacement pressure switch to arrive for the compressor.

Fudge! I was really hoping to finish off those corridor sections quickly.

Monday, 20 June 2016

Chopping up wood

Of course, the airlock isn't really an airlock. It's really just the room that leads to the airlock. Tonight I've been chopping up some of the pieces of a corridor section and a single wide door section to make the airlock itself. I think this one is going to need a lot of plasticard, not to mention some green stuff..

Thursday, 16 June 2016

Airlock progress

So it turns out that it's actually five times the charm. With four sheets consigned to the bin, the fifth one finally turned out okay well enough to do 90% of the airlock. I will be adding a space behind the four smaller doors to store some EVA suits  (most likely the Ainsty ones) but right now the only other detailing step are the four walls leading into / out of the airlock. I was originally going to leave them blank but now I think I might put some detail on the lower part of those walls.

Tuesday, 14 June 2016

Dead Ends

Some of the dead ends I have customised and primed. I used some regular card for the one on the left to create a section of raised wall but I don't like how it turned out as it's obviously card. I will probably stick to layers of plasticard in the future.